
Browser and Name Value sections in Hypermesh are important sections that display and help with editing components, materials, properties, contacts, etc.
In this post, we are going to discuss the browser and Name Value sections highlighted in blue and green respectively.
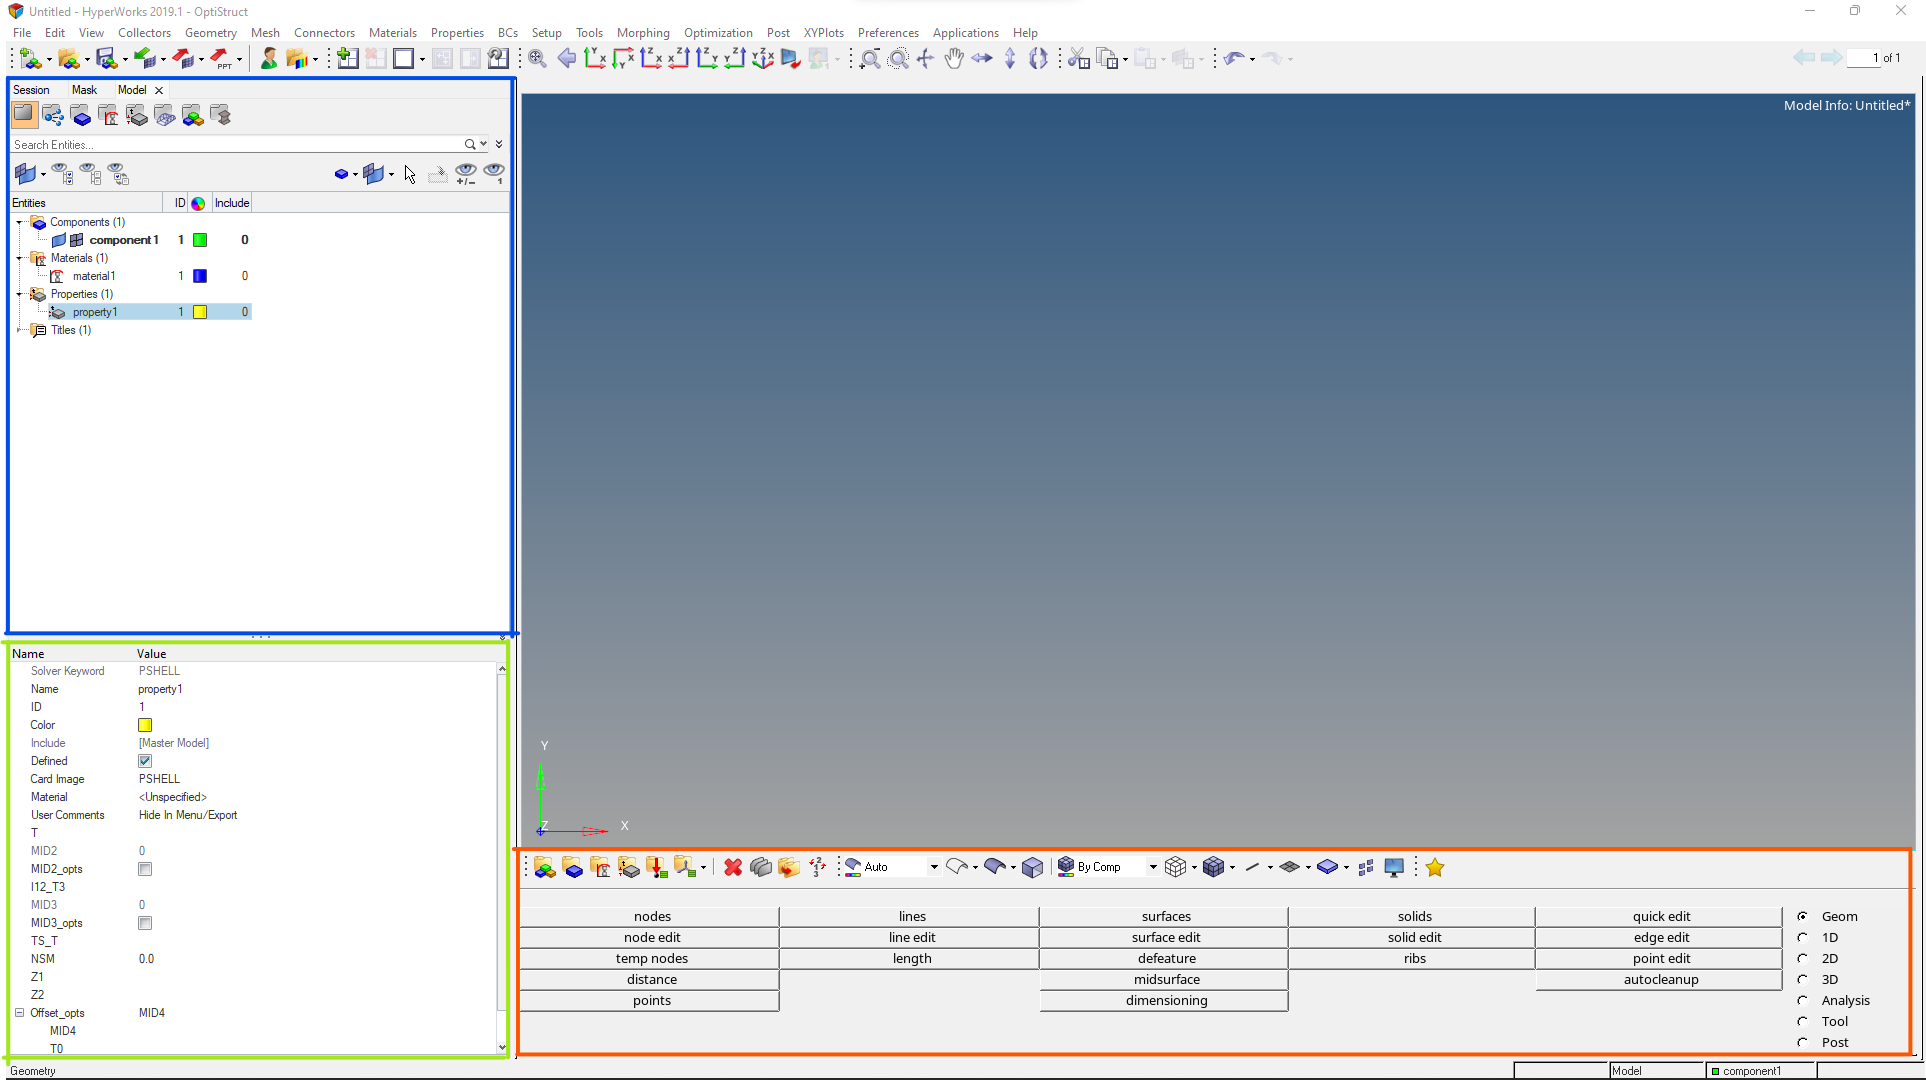
The Browser contains Mask, Model, and Model Checker tabs. We are going to see what is available under these sections. We will Start with the Mesh tabs.
Mask tab:
This section displays all the connectors, 1D, 2D, 3D elements. We can hide the above things collectively instead of hiding them through their components.
Model tab:
This section contains the components, materials, and properties, contact, contact surfaces, load step, load collector. Through this tab we can add, delete, edit components, materials, properties, contacts, and contact surfaces.
Model Checker tab:
This section is used to check the model quickly to see if you have any duplicate elements or if you forgot to assign material or property to any component or is there a dependency problem in the model. To check the problems in the model you have to go to the model checker tab and right-click and select ‘Run Model Checker’. If the Model Checker is not showing it can be accessed through Tools -> Model Checker.
The Name Value section is used to see the data or values in the different fields of components, materials, properties etc. There are some fields that need to be filled mandatorily to run the analysis as mentioned below.
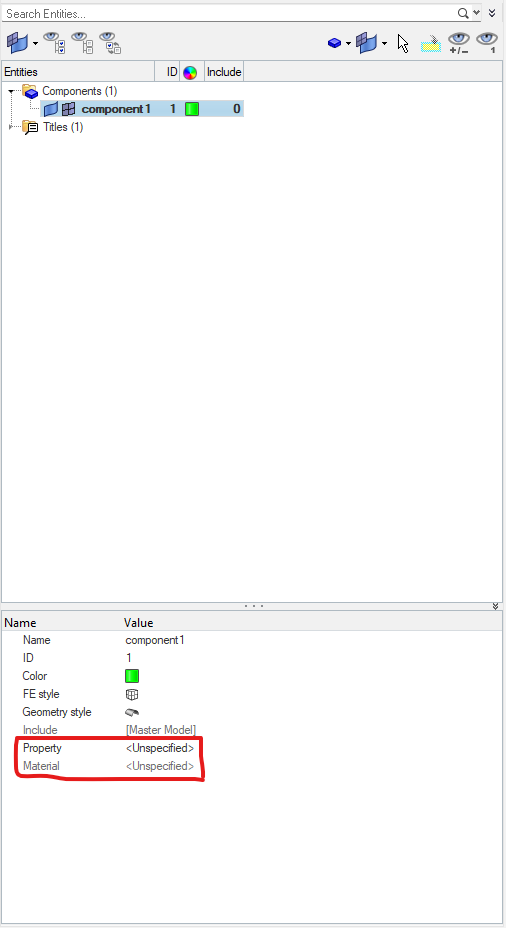
- For all the components the material and property should be defined. It can be defined by selecting the component and selecting a value for material and property from their respective fields as shown in the below image.
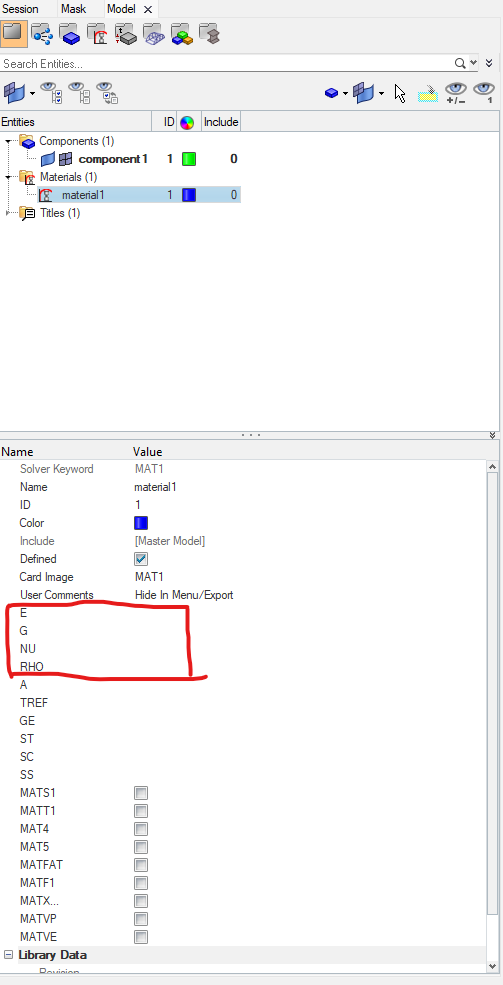
2. For declaring a material its Young’s, Shear, and Bulk modulus values need to be defined along with density in the fields shown in the image below.
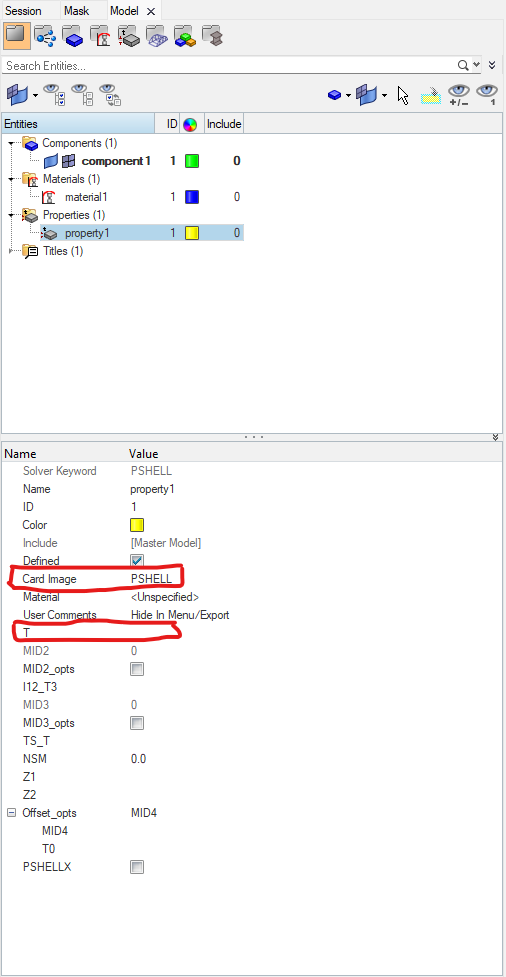
3. For defining a property, we need to select an appropriate property card like PSolid, PShell, or PWeld and assign thickness in the case of PShell, i.e. for 2D elements in the fields shown in the image below.
Read more about Material and Properties here.
That’s all for this post. See you all in the next post. Don’t forget to follow my Facebook and Instagram pages for regular updates. Till then keep learning.