In the previous posts, we had discussed SPH with LS-Dyna Solver. If you have not seen that post, you can check it out here. In this post, we are going to perform a drop test using LS Dyna.
So let’s start by understanding why a Drop test is needed.
Drop tests are used across a wide range of industries to evaluate how well products, materials, or packaging can withstand sudden impacts—like being dropped during handling, shipping, or everyday use. Some notable industries are Packaging and Logistics, Consumer Electronics, Medical Devices, Construction, Automotive, and Aerospace.
Performing Drop Test
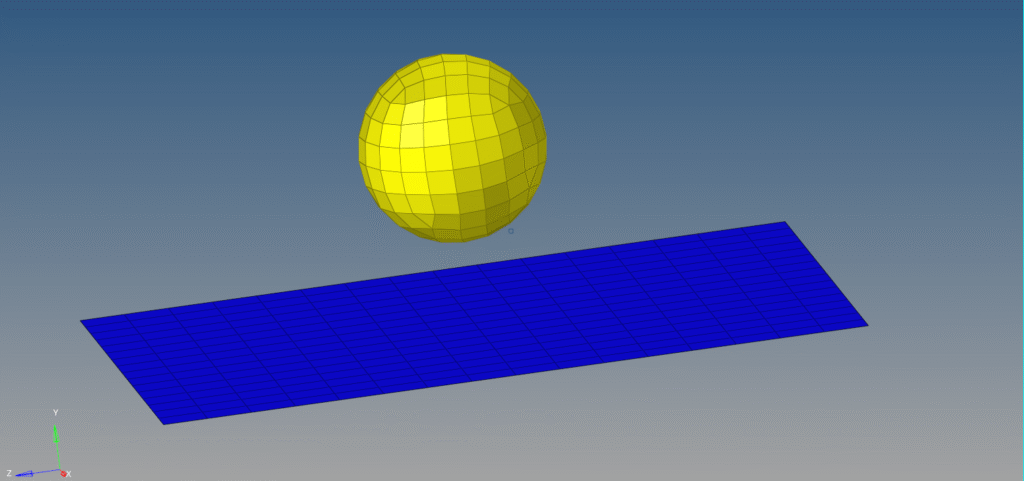
For this tutorial, we will use a rectangular surface to represent the Floor and a spherical surface to represent the Tennis Ball. We will be making the floor rigid and the ball elastic, and observing the ball in free fall under the influence of gravity.
Meshed Model
I have meshed the Floor and the Tennis Ball component using 2D quad elements as shown in the image below.
Boundary Condition
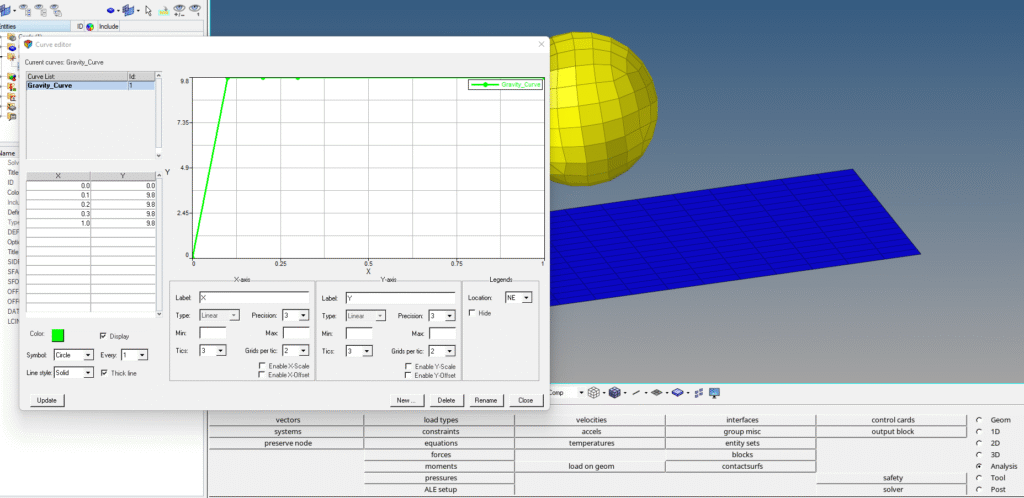
First, we will create the curve for the gravity. For this, we can right-click on the white browser area and then go to Create -> Curve. We will name this as Gravity_Curve. Then, we will populate the data points for the curve as shown in the image below.
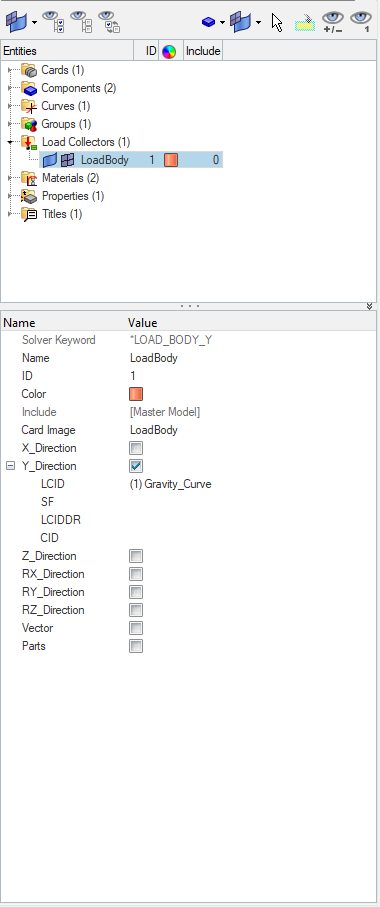
Second, we will create a load collector to load the Tennis Ball component in the Y direction. We can do this by right-clicking on the white browser area and then going to Create -> Load Collector. We will name this load collector LoadBody and select the card image for this load collector as LoadBody, and then select the Y direction and select the Gravity_Curve under the LCID field, as shown in the image below.
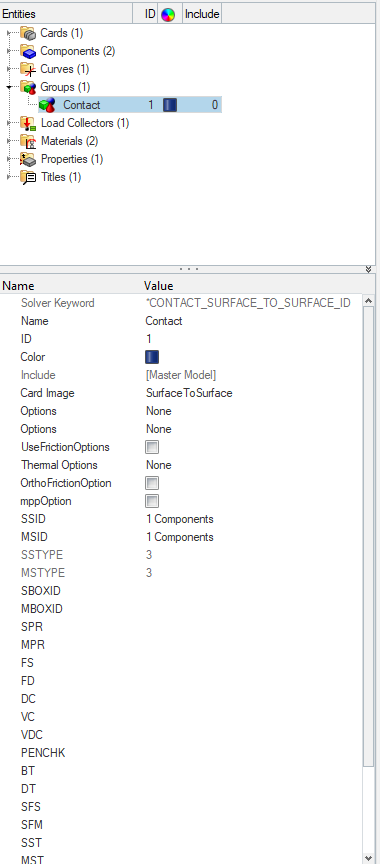
Next, we will create contact between the Floor and the Tennis Ball. We can do this by right-clicking on the white browser area and then going to Create -> Contact. We will name this collector as Contact. Select the Tennis Ball component in the SSID field and the Floor Component in the MSID field as shown in the image below.
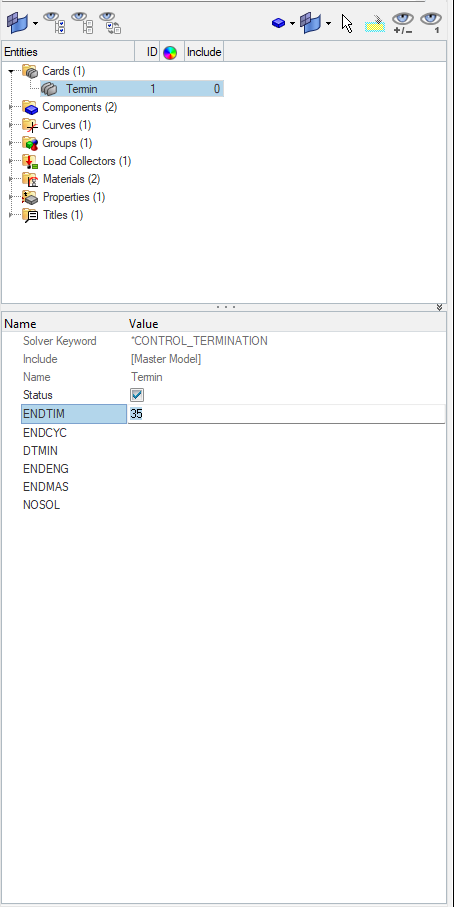
Next, we will create Control Cards. First, we will create the control termination card. For this, we can right-click on the white browser area and then go to Create -> Control -> Control_Termination, set ENDTIM as 20.
Analysis Setup
Now we will create material and property for the Floor and Tennis Ball component.
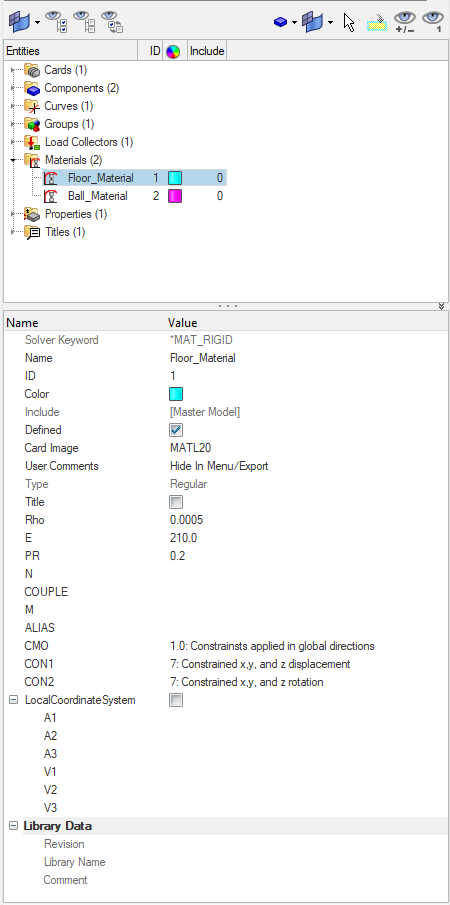
We can create material by right-clicking on the white browser area and then going to Create -> Material. We will name this material Floor_Material and select MATL20 as the card image and values as shown in the image below.
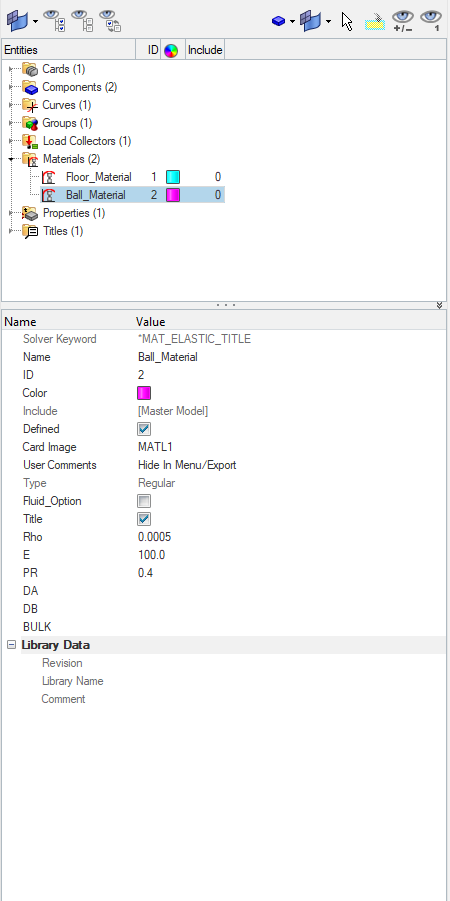
Next, we will create material for the TennisBall component by right-clicking on the white browser area and then going to Create -> Material. We will name this material Ball_Material and select the card image as MATL1 and values as shown in the image below.
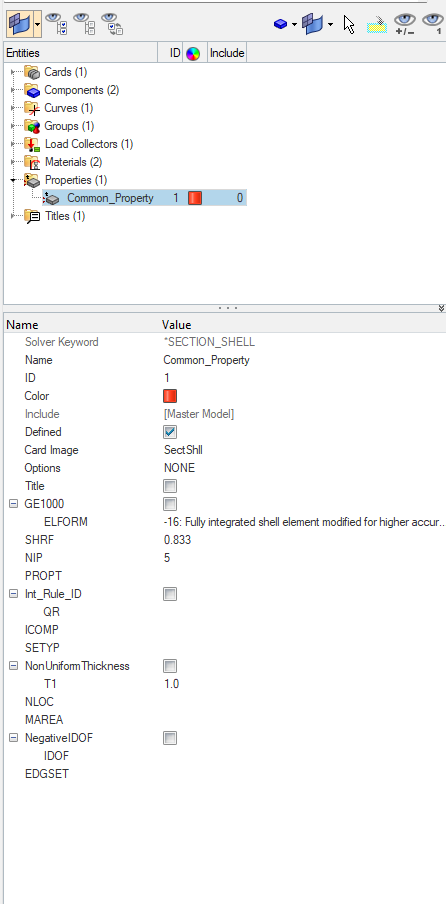
Next, we need to create a property for the Floor component. For this, we can again go to the white browser area and right-click on the white browser area, and then go to Create -> Property. We will name this property common_property and assign the Sectshll card image to it and values as shown in the image below.
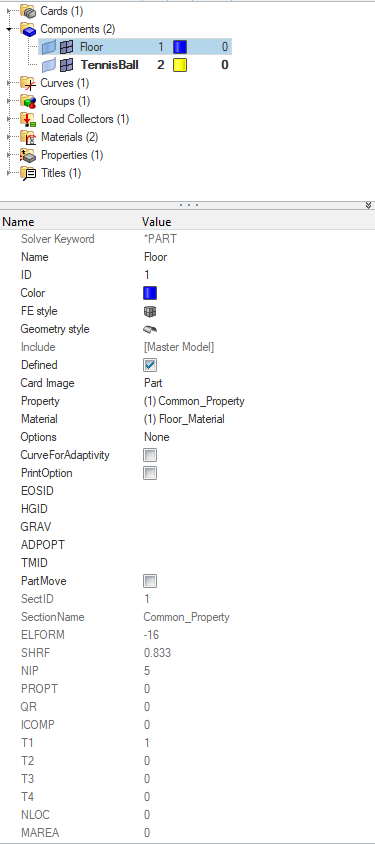
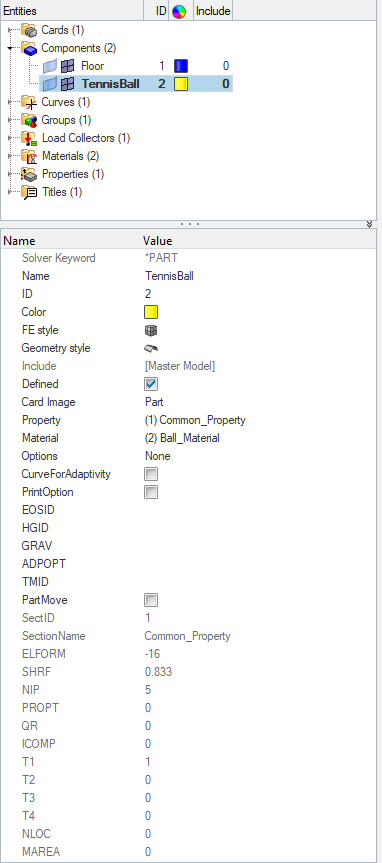
Now we will assign the materials and properties to the components as shown in the image below.
Performing Analysis
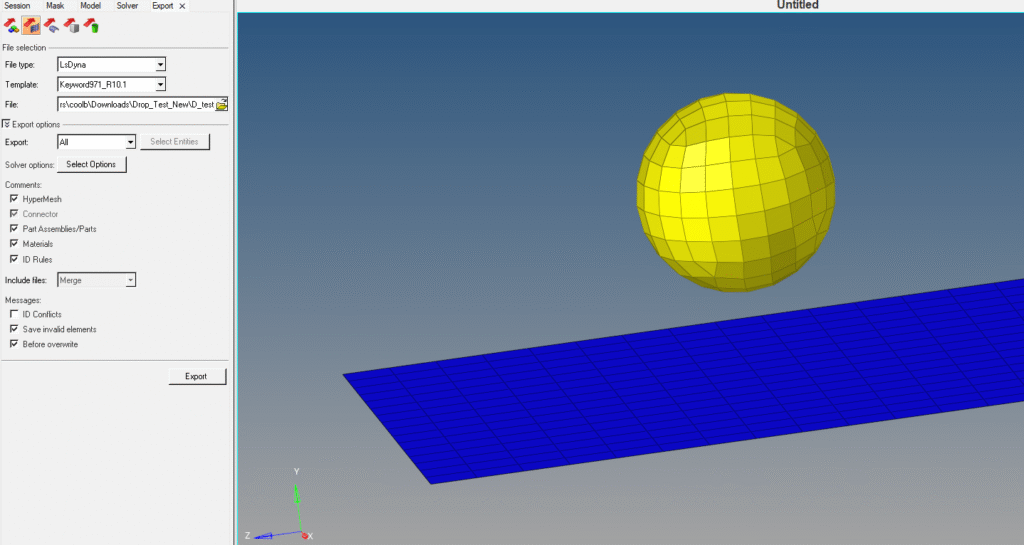
Now we have everything in place. We will perform the analysis. For this, we first need to export the K file. We can do this by going to File -> Export and then selecting the export location and name of the file.
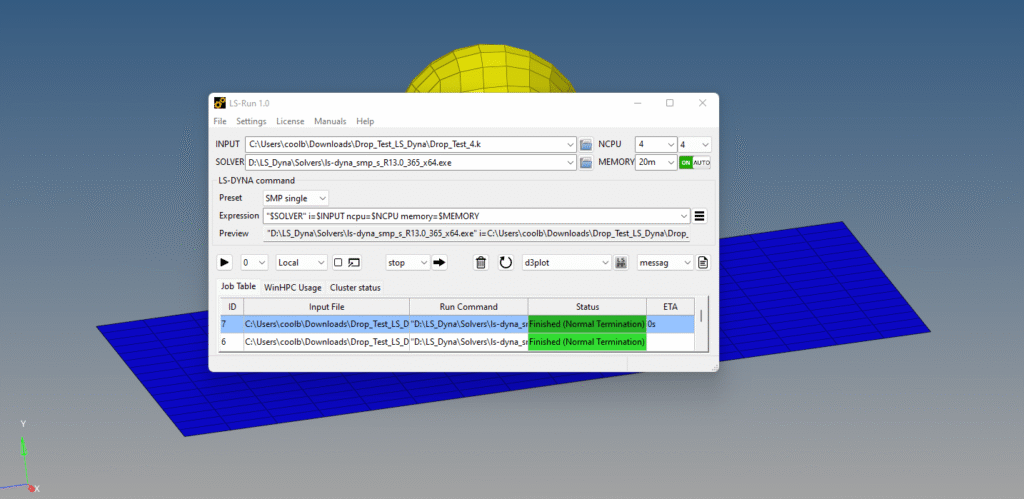
After this, we can open the LS-Dyna Solver and select the K file and run it as shown in the image below.
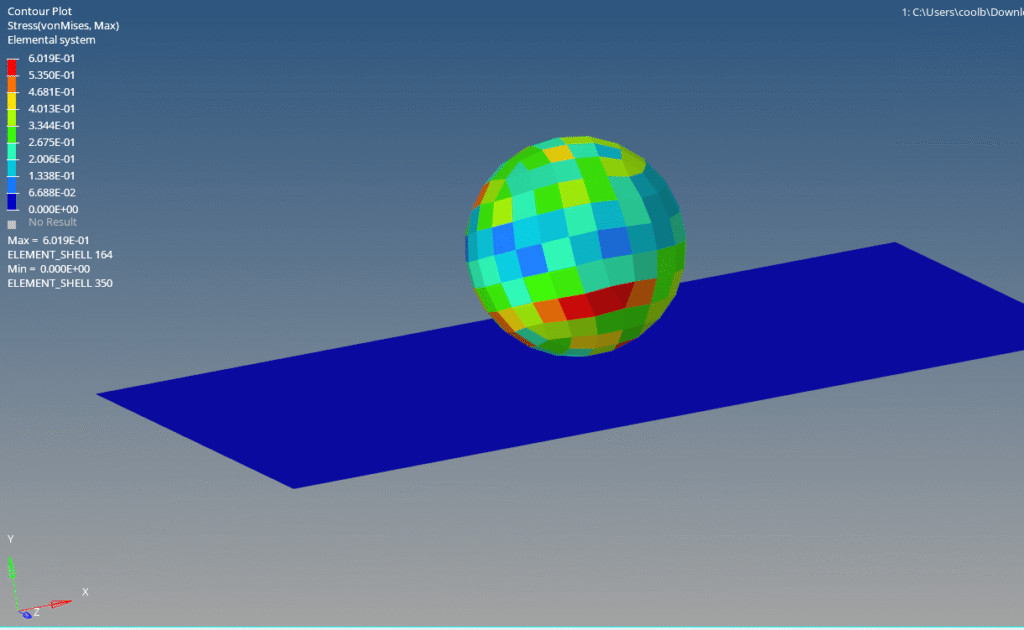
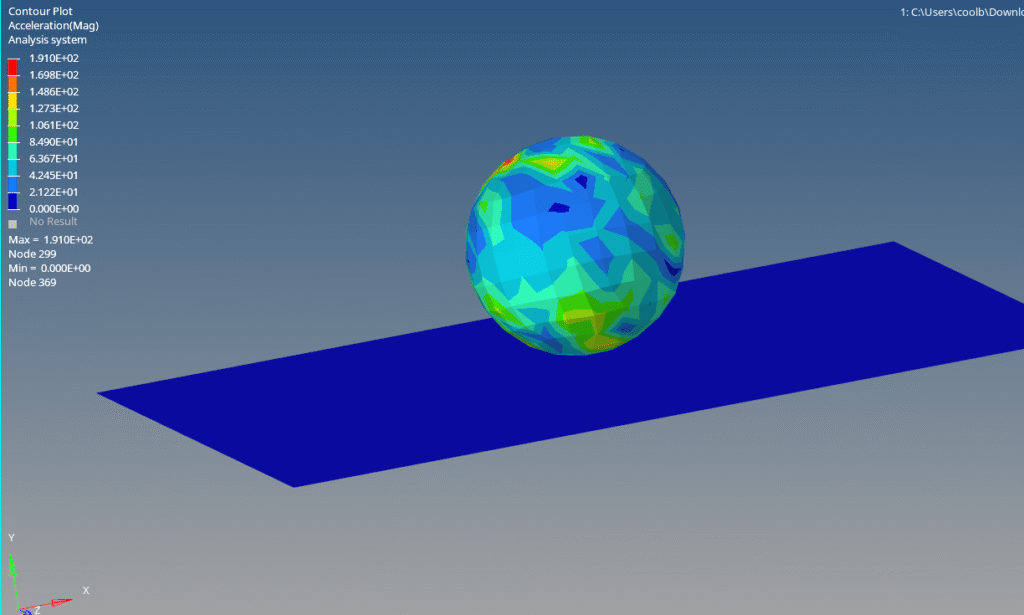
Output
After you run the LS-Dyna solver, a pop-up window will appear showing the progress of the run.
After the run is complete, we can open Hyperview and select the K file and the op2 file to view the output results as shown in the image below.
You can also refer to the video below for more clarity.
This is all for this post. I hope you learned something from this post. Don’t forget to follow my Facebook and Instagram Pages for regular updates. See you all in the next post. Till then, keep learning.