In the previous post, we had performed dynamic analysis using Radioss. If you have not seen that post, you can check it out here. In this post, we are going to perform the same dynamic analysis using LS-Dyna.
If you want to know the difference between these solvers like LS-Dyna, Radioss, etc., you can check it out here.
So let’s start by understanding what Dynamic Analysis is.
What is Dynamic Analysis?
Dynamic analysis is the analysis of bodies under motion, that is, when they are moving. In this tutorial, we are going to simulate a bird crash into an aircraft windshield. We will be using SPH elements to represent a bird.
So the question arises: What are SPH elements?
What are SPH Elements?
SPH stands for Smooth Particle Hydrodynamics. These are basically very soft particles that dissociate on crashing with a higher-density object.
Performing SPH Analysis
For this tutorial, we will use a surface to represent the windshield of an airplane and an ellipsoid with a flat face to represent a bird. We will be fixing the sides of the windshield and applying an initial velocity to the bird component.
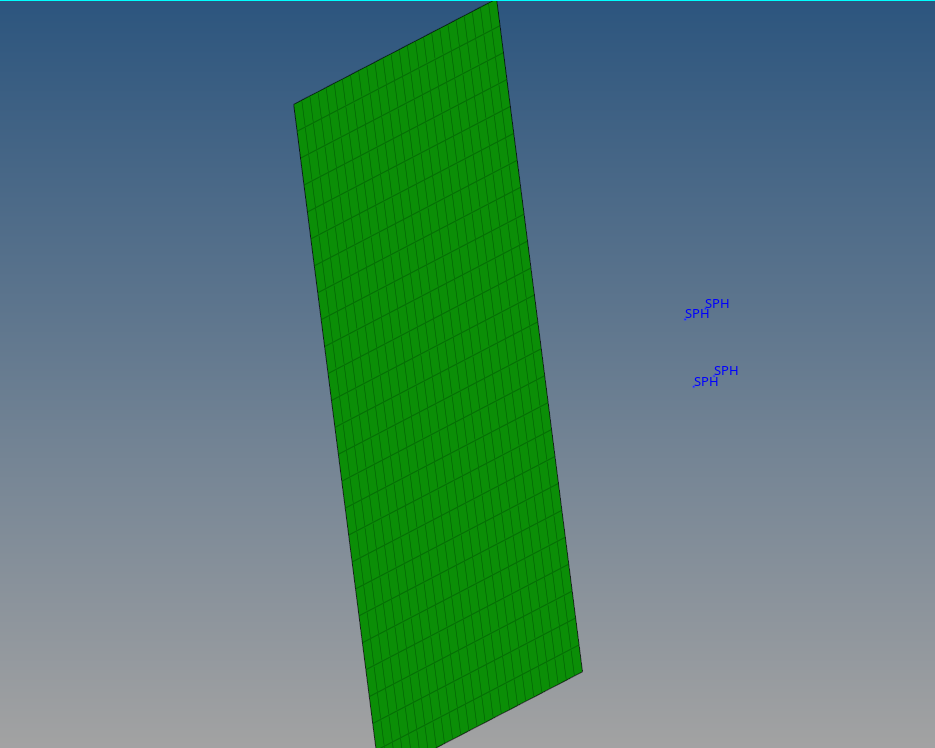
Meshed Model
I have meshed the windshield of the airplane using 2D quad elements and the bird component with SPH elements.
For meshing the bird component with the SPH element, we can go to 1D -> SPH and then select the surface, pitch, and material density to create the SPH elements as shown in the image below.
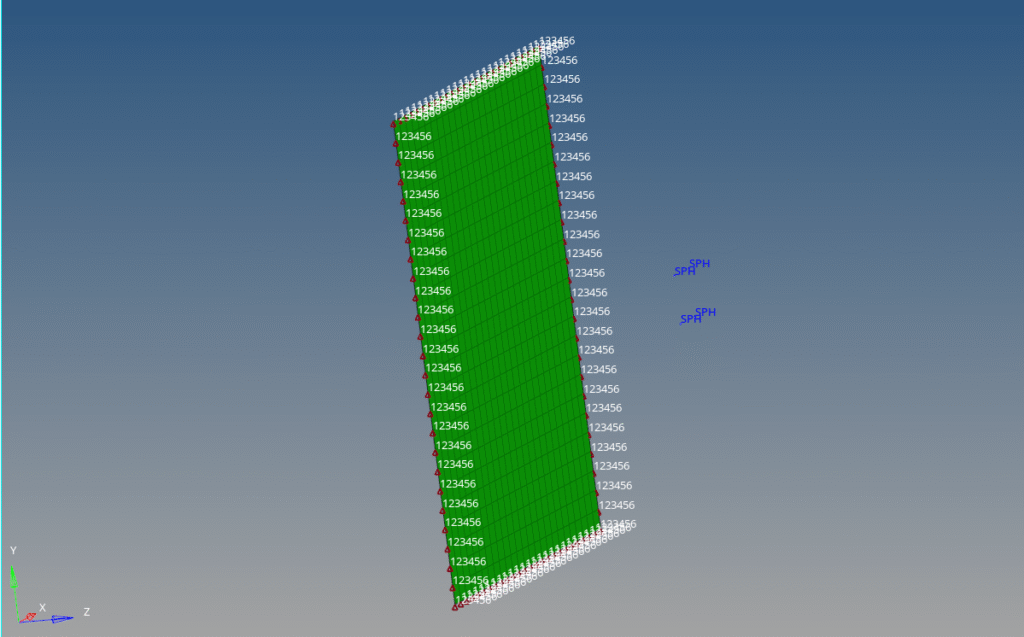
Boundary Condition
We will create a load collector to constrain the windshield in space from the Solver browser. To fix this windshield, we can right-click on the white browser area and then go to Create -> Boundary ->. Then, select the nodes along the edges of the windshield, and constrain the nodes of the windshield as shown in the image below.
If the Solver browser is not visible, you can go to View -> Browsers -> Hypermesh and then select the Solver browser.
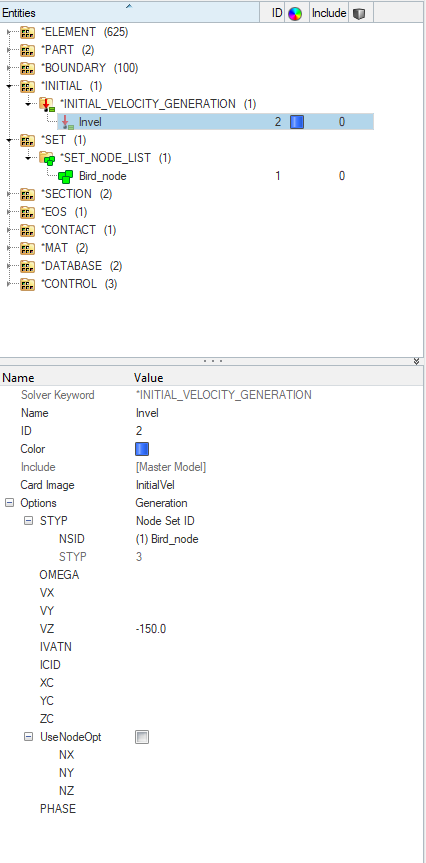
Next, we will create a load collector for the velocity of the bird component. For this, we need to create a set containing all the SPH elements. We can do this by right-clicking on the white-browser area and then going to Create -> Set -> Set_Node_List. In the Solver browser, we will name this set as Bird_node.
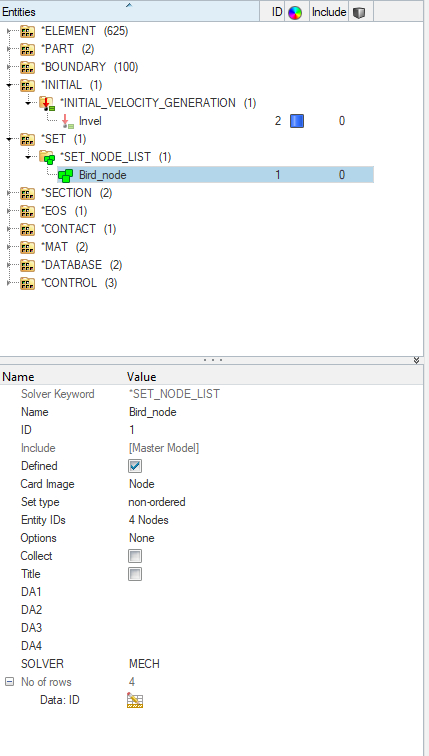
We will assign a velocity of 150 m/s in the negative Z direction to the bird set as shown in the image below.
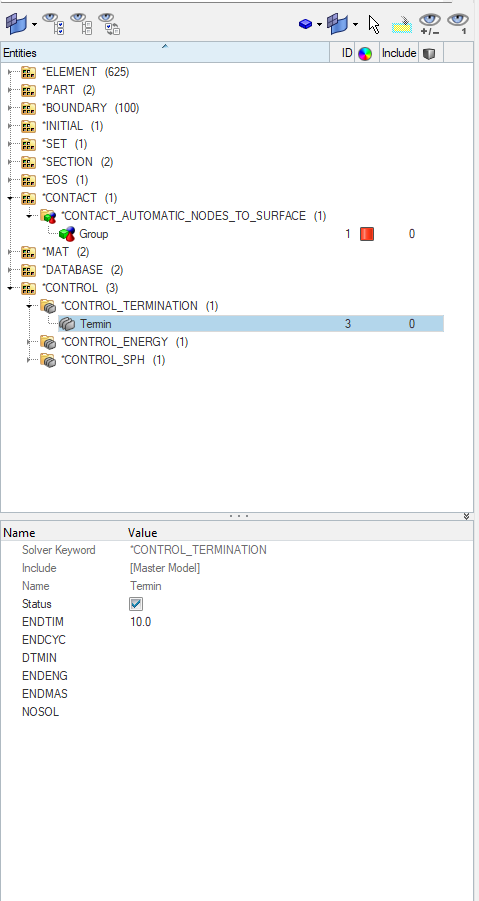
Next, we will create Control Cards. First, we will create the control termination card. For this, we can right-click on the white browser area and then go to Create -> Control -> Control_Termination, set ENDTIM as 10.
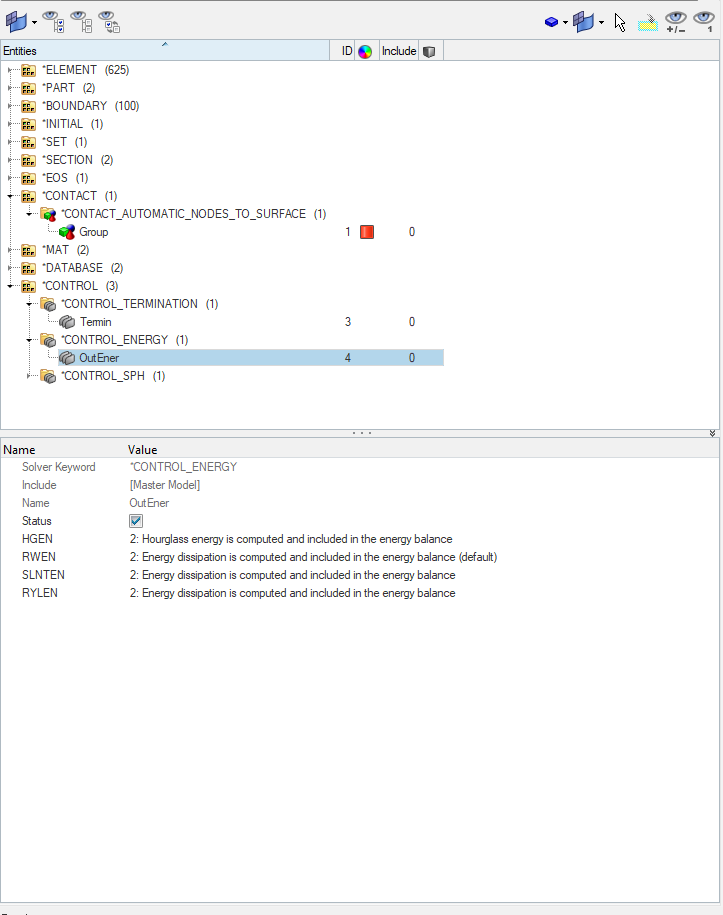
Second, we will create a control energy card. For this again, we can right-click on the white browser area and then go to Create -> Control -> Control_Energy and then select the 2nd option in all the fields.
Third, we need to create the control sph card. For this again, we can right-click on the white browser area and then go to Create -> Control -> Control_SPH and then select the 3rd option in the IDIM field and 0 option in FORM field.

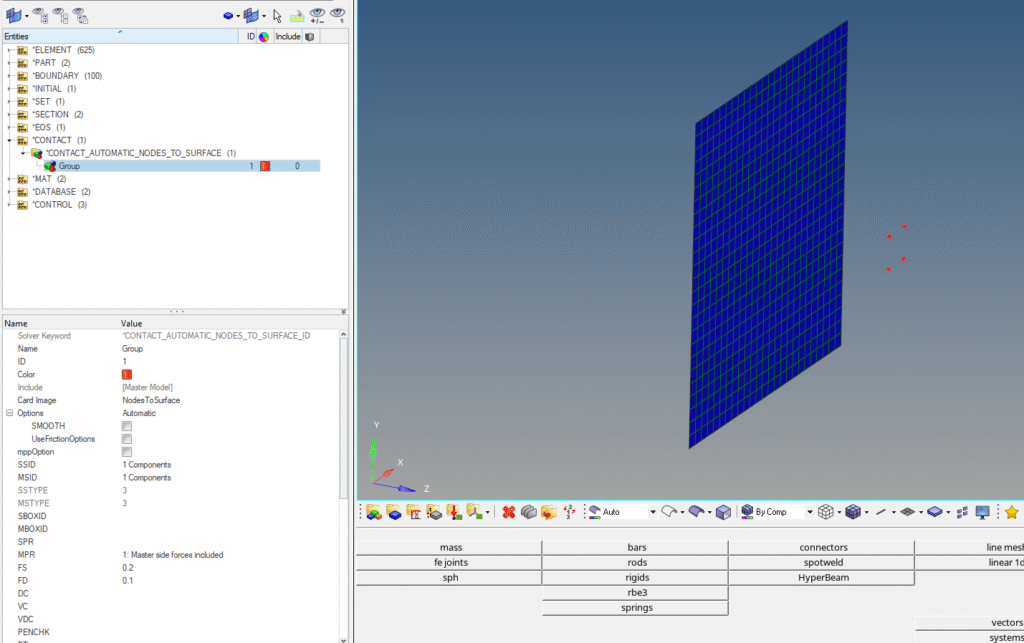
Next, we need to define the contact between the windshield and the bird component. For this, we can right-click on the white browser area and then go to Create -> Contact -> Contact_Automatic_Nodes_To_Surface, and then select the SPH elements under the Slave entity and the Windshield elements under the Master entity as shown in the image below.
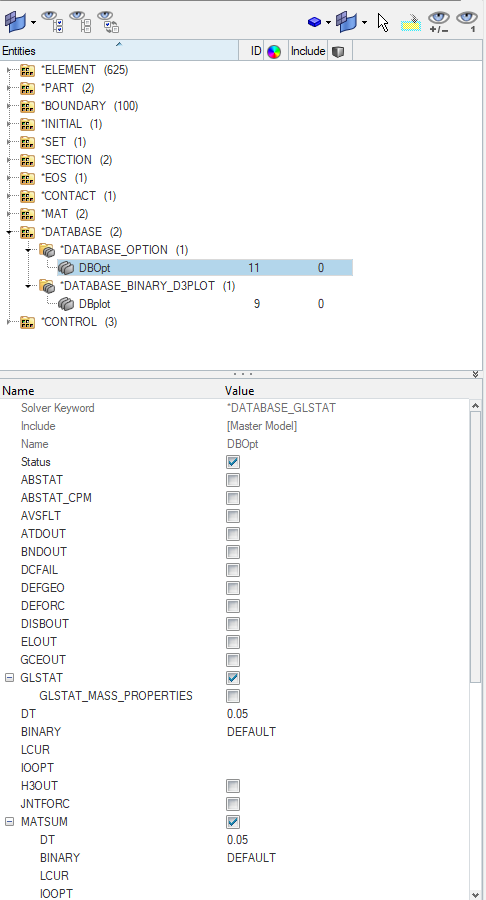
Next, we will create the database cards. First, we will create the Database Option card. For this, we can right-click on the white browser area and then go to Create -> Database -> Database_Option and insert the values as shown in the image below.
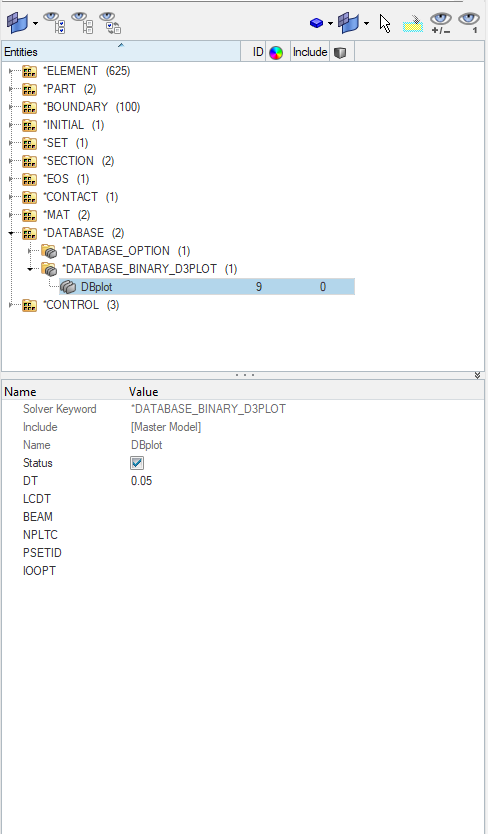
Next, we will create Database binary plot card. For this, we can right-click on the white browser area and then go to Create -> Database -> Database_Binary_D3PLOT and then insert the values as shown in the image below.
Analysis Setup
Now we will create material and property for the Windshield and Bird component.
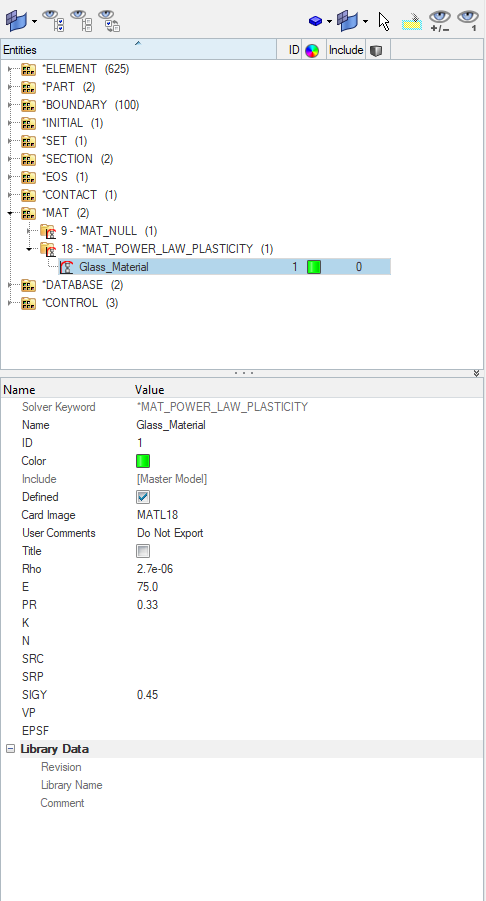
We can create material by right-clicking on the white browser area and then going to Create -> Mat -> 18-MAT_Power_Law_Plasticity. We will name this material Glass_Material as shown in the image below.
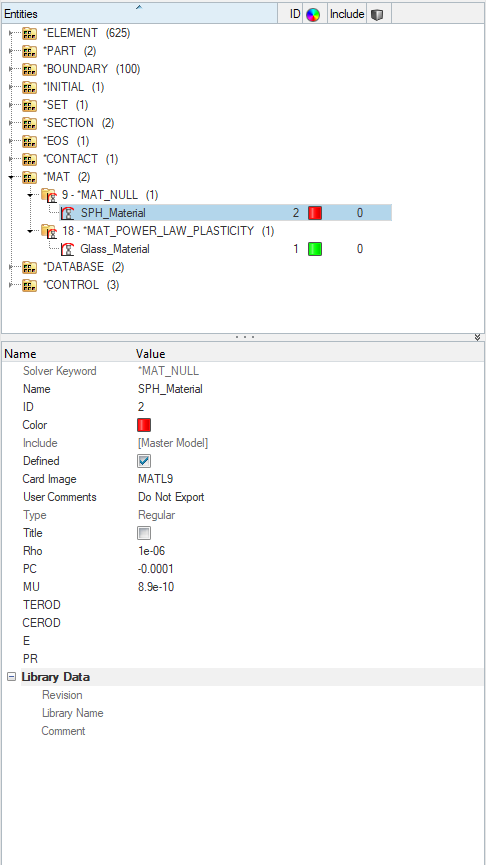
We will create the material for the bird component by right-clicking on the white browser area and then going to Create -> Mat -> Law 9-MAT_NULL. We will name this material SPH_Material as shown in the image below.
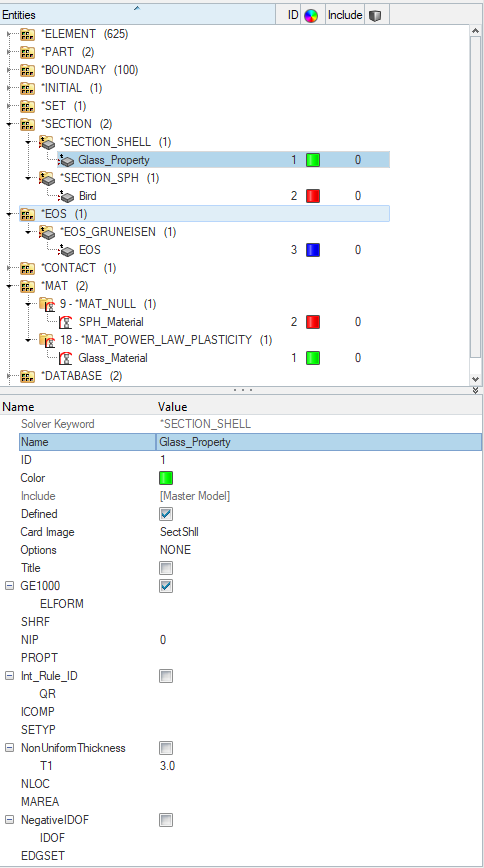
Next, we need to create a property for the Windshield. For this, we can again go to the white browser area and then right-click on the white browser area, and then go to Create -> Section -> Section_Shell. We will name this property Glass_property as shown in the image below.
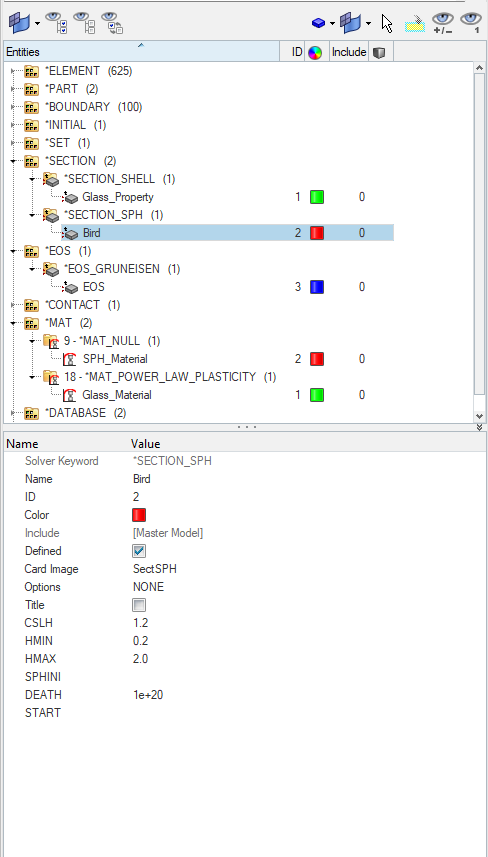
Next, we will create material for the Bird. For this, we can again right-click on the white browser area and then go to Create -> Section -> Section_SPH. We will name this as bird and insert the values as shown in the image below.
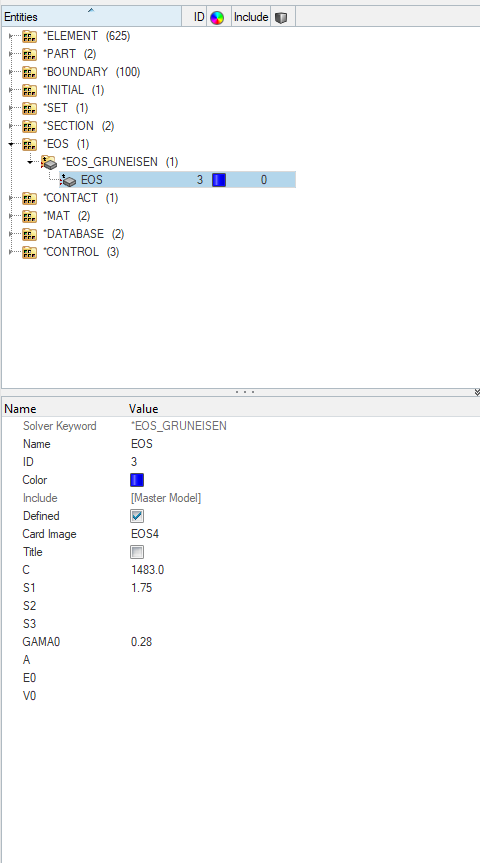
Next, we will assign these materials and properties to the respective components. But before that, we need to create an Equation of State (EOS) for the bird. For this, we can right-click on the white browser area and then go to Create -> EOS -> EOS_GRUNEISEN. We will name this as EOS and insert the values as shown in the image below.
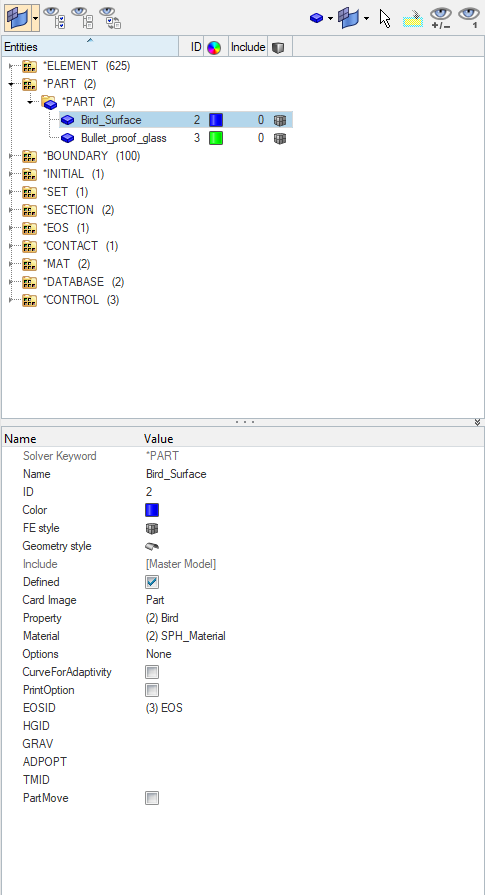
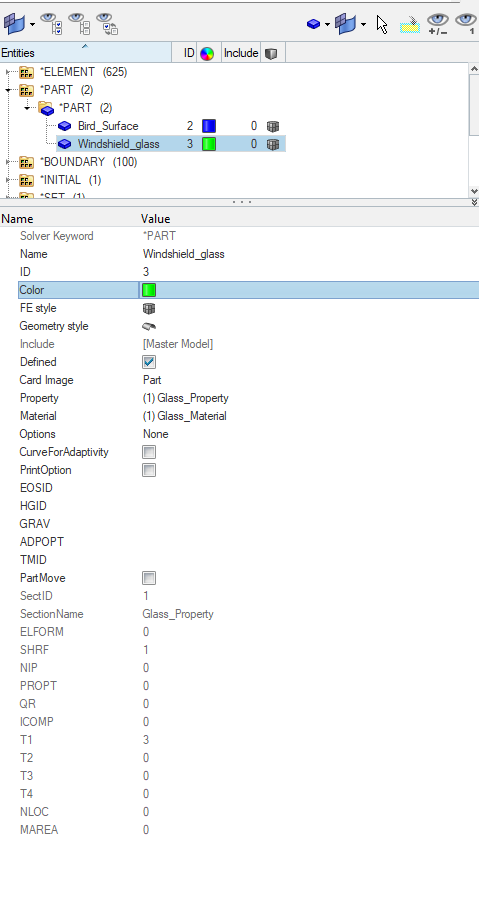
Now we will assign the materials and properties to the components as shown in the image below.
Performing Analysis
Now we have everything in place. We will perform the analysis. For this, we first need to export the K file. We can do this by going to File -> Export and then selecting the export location and name of the file.
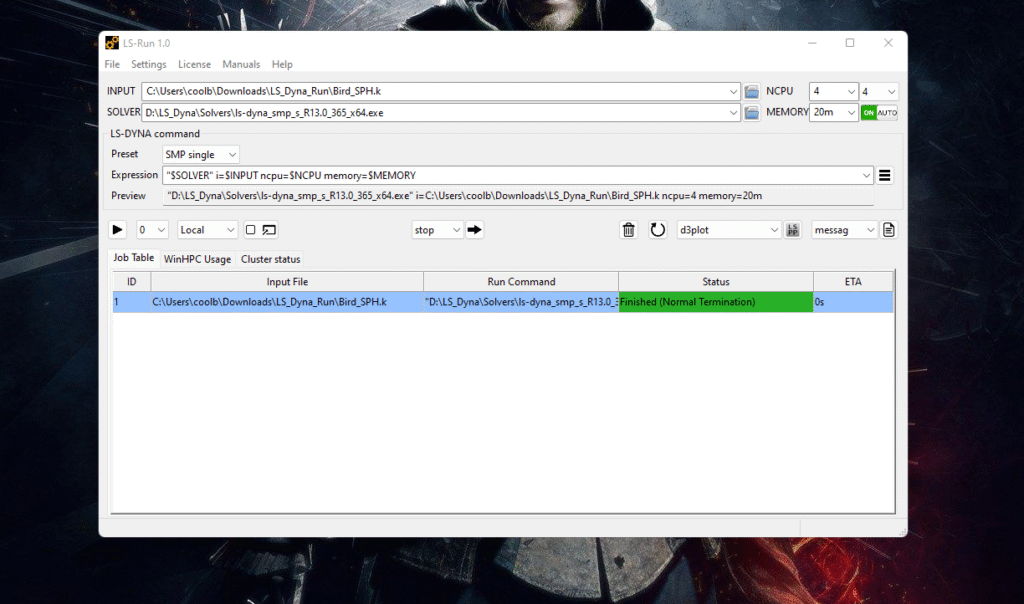
After this, we can open the LS-Dyna Solver and select the K file and run it as shown in the image below.
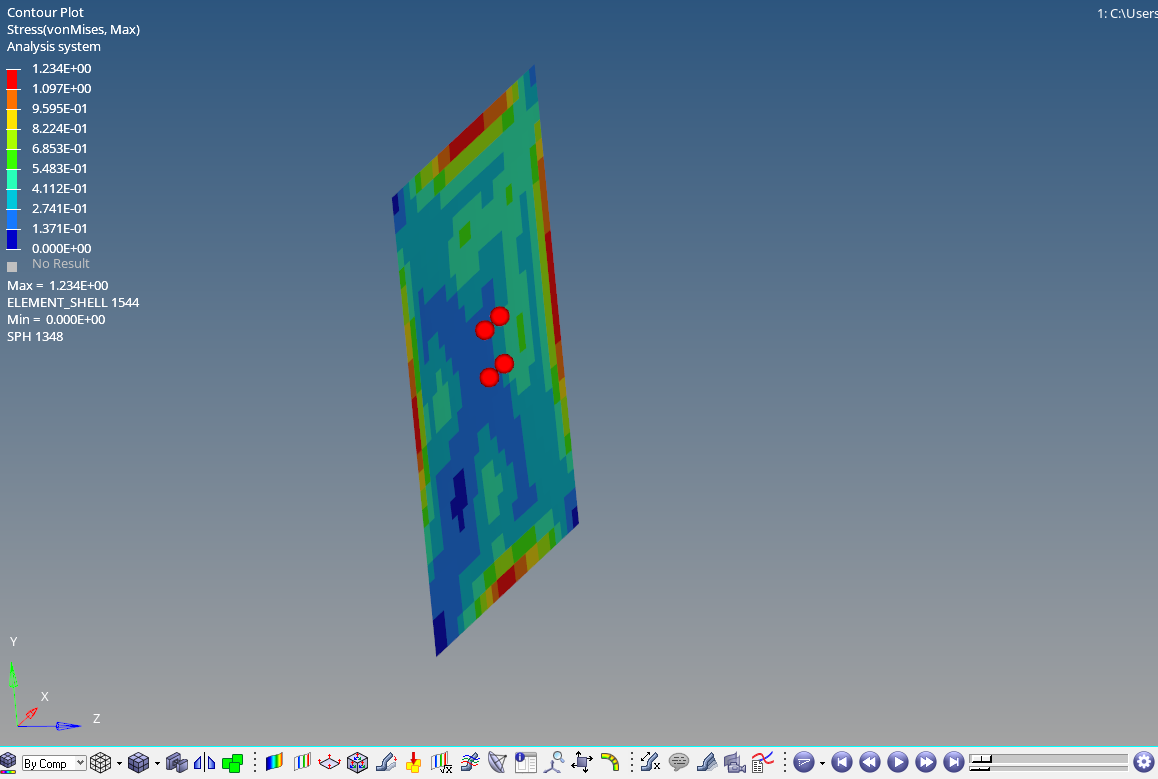
Output
After you run the LS-Dyna solver, a pop-up window will appear showing the progress of the run.
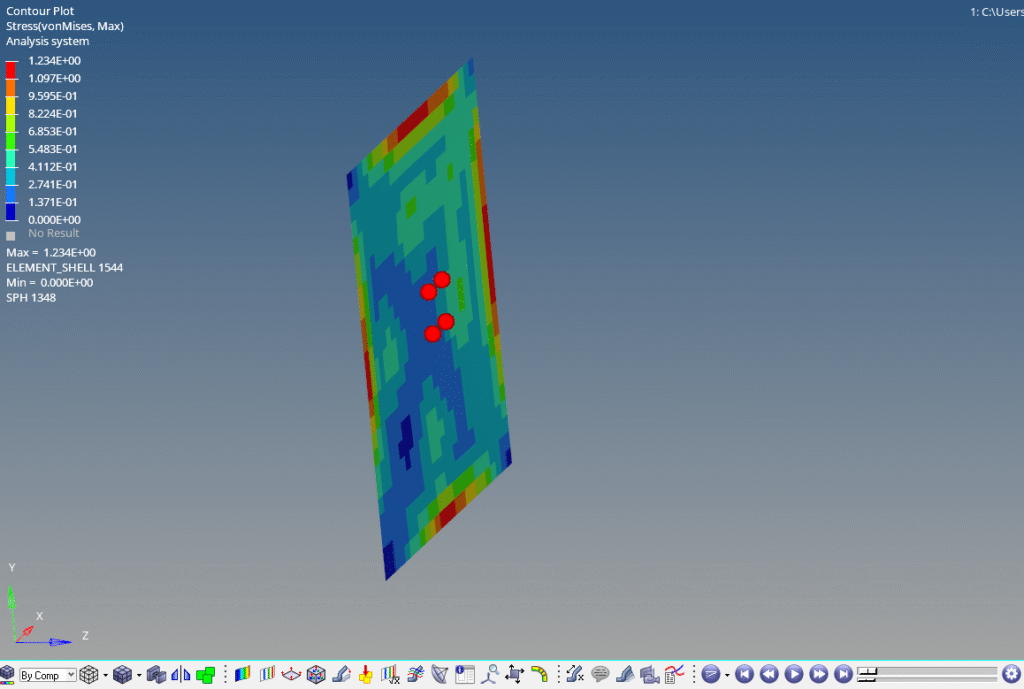
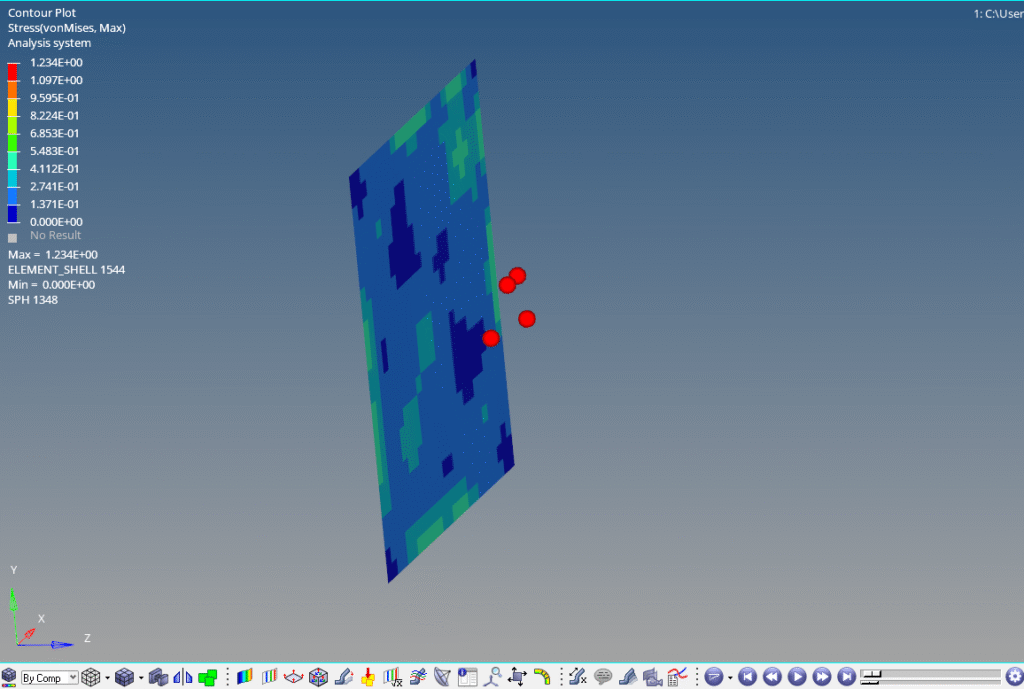
After the run is complete, we can open Hyperview and select the K file and the op2 file to view the output results as shown in the image below.

You can also refer to the video below for more clarity.
This is all for this post. I’ll see you all in the next post. Don’t forget to follow my Facebook and Instagram Pages for regular updates. Until then, keep learning.