Till now we have gone through options and tricks available in Hypermesh. In this post, we are going to do a simple tutorial on a simply supported beam for different configurations of constraints for a better understanding of how to perform analyses in Hypermesh.
Just to have a background Linear Static Analysis is a method to calculate the displacement, stress, and strain on a body under applied load conditions. It is called linear because the relationship between load and deformation is linear. So chronologically we are going to create a beam, then apply different combinations of constraints, apply a load, and then analyze the different results.
Creating a Beam
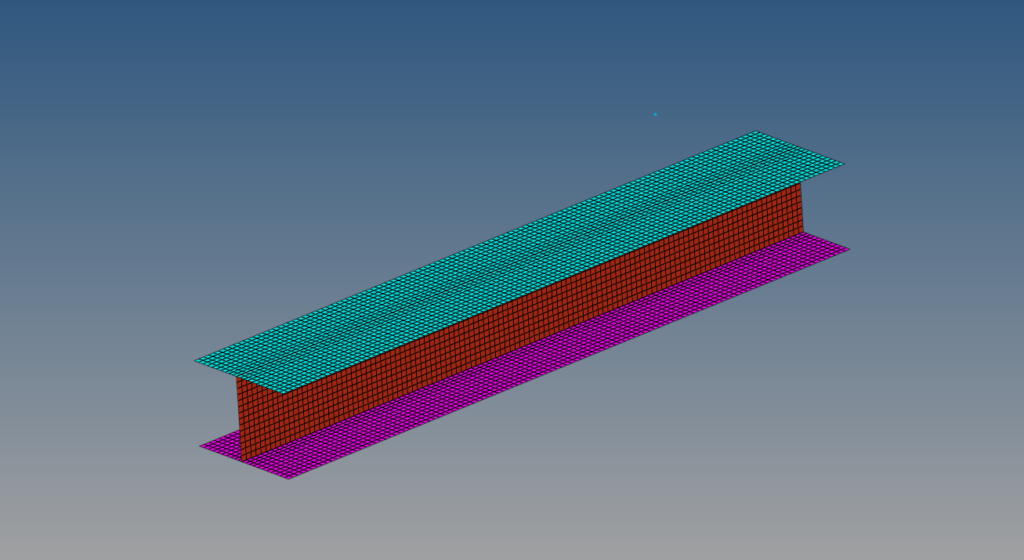
We have to make an I Beam according to the following dimensions and import it into Hypermesh:
Top and Bottom Flange: 230 mm x 40 mm
Middle Section: 230 mm x 24 mm
We will mesh all the sections with 2D elements of mixed element type and size 2. The meshed beam will appear somewhat like in the below image.
Boundary Condition (Constraints & Loads)
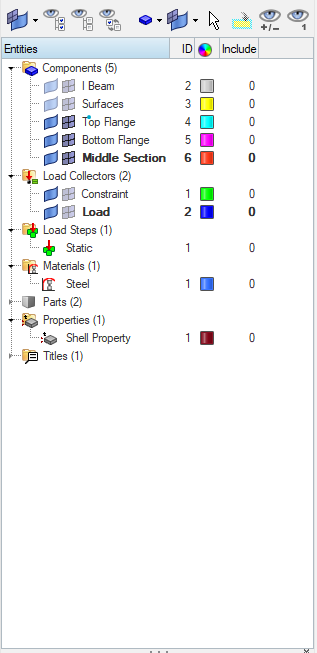
To apply constraints and load on the beam create two load collectors named constraint and Load. Now make the constraint load collector as current and apply constraints on the ends of the bottom flange of the beam according to the below two cases.
- Fix all the degrees of freedom at both ends of the I beam, i.e. dof1- dof6 should all be 0.
- Fix only dof3, dof6.
To apply constraints we have to go to Analysis -> Constraints in the toolbar.
Next, make the Load load collector current and apply a uniformly distributed load on the top flange of the I beam. The Load can be applied by going to Analysis -> Forces.
Analysis setup
We have to now apply material, property, and create load step.
Create a PSHELL property by right-clicking on the white area on the browser area and selecting Create -> Property, then select the card image as PSHELL assign thickness as 1.2 mm apply it to all the component collectors of all the faces.
Then create a material by right-clicking on the white browser area and going to Create -> Material, we will use steel for this tutorial, the values of steel are available by default in Hypermesh.
Then create a load step, by right-clicking on the browser window and selecting Create -> Load Step. Select the analysis type as Linear Static, then select the SPC as the constraint load collector and the load as the load load collecter.
Performing Analysis
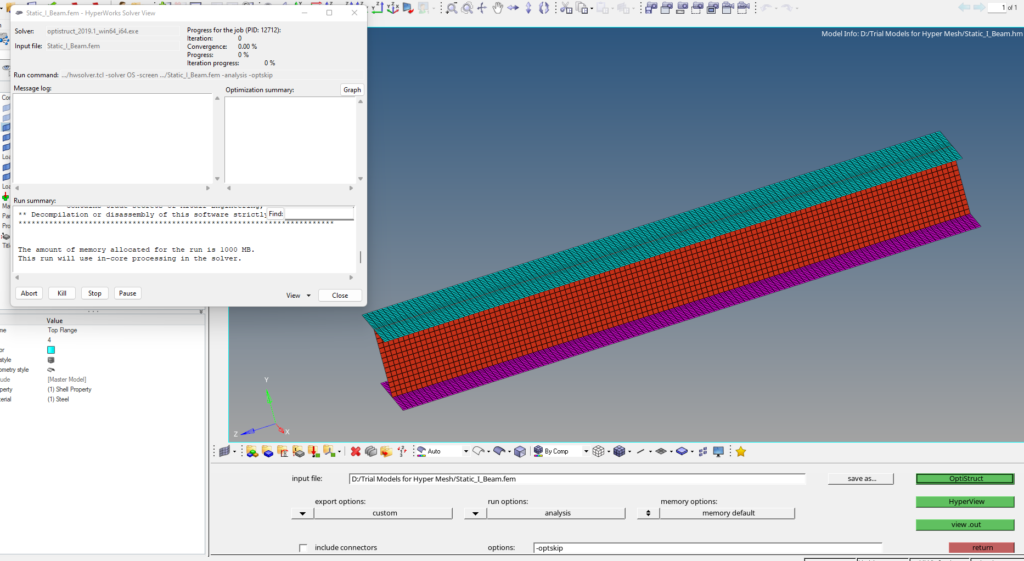
Go to the toolbar, then go to the Analysis and select Optistruct, a window similar to the below image will appear.

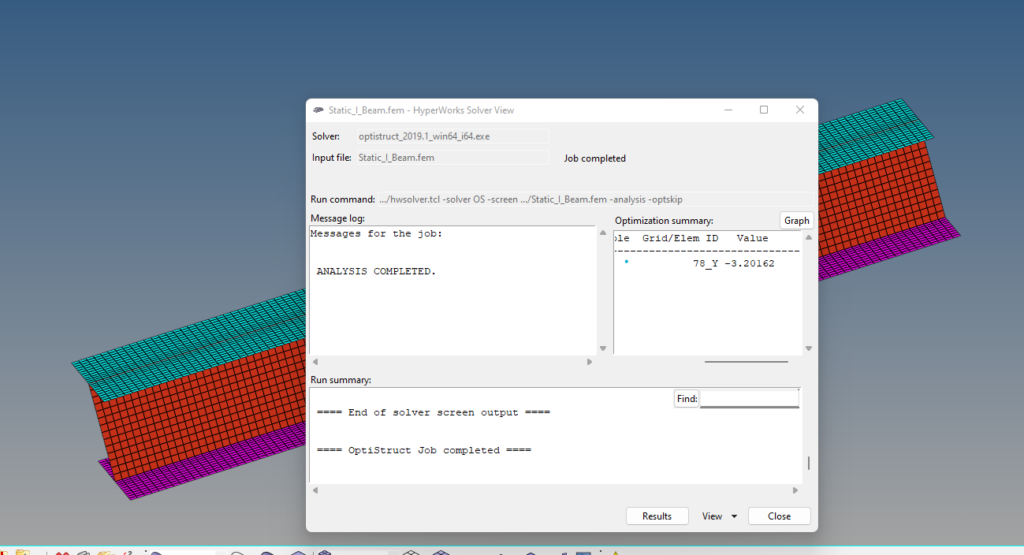
If the optistruct option is not appearing under Analysis in the toolbar. Then go to Preference -> User Profile and select Optistruct. Select export options as custom, run options as Analysis, and keep the memory option as default. Then click on Optistruct to run the analysis. A popup window as shown in the image below will appear.
Output
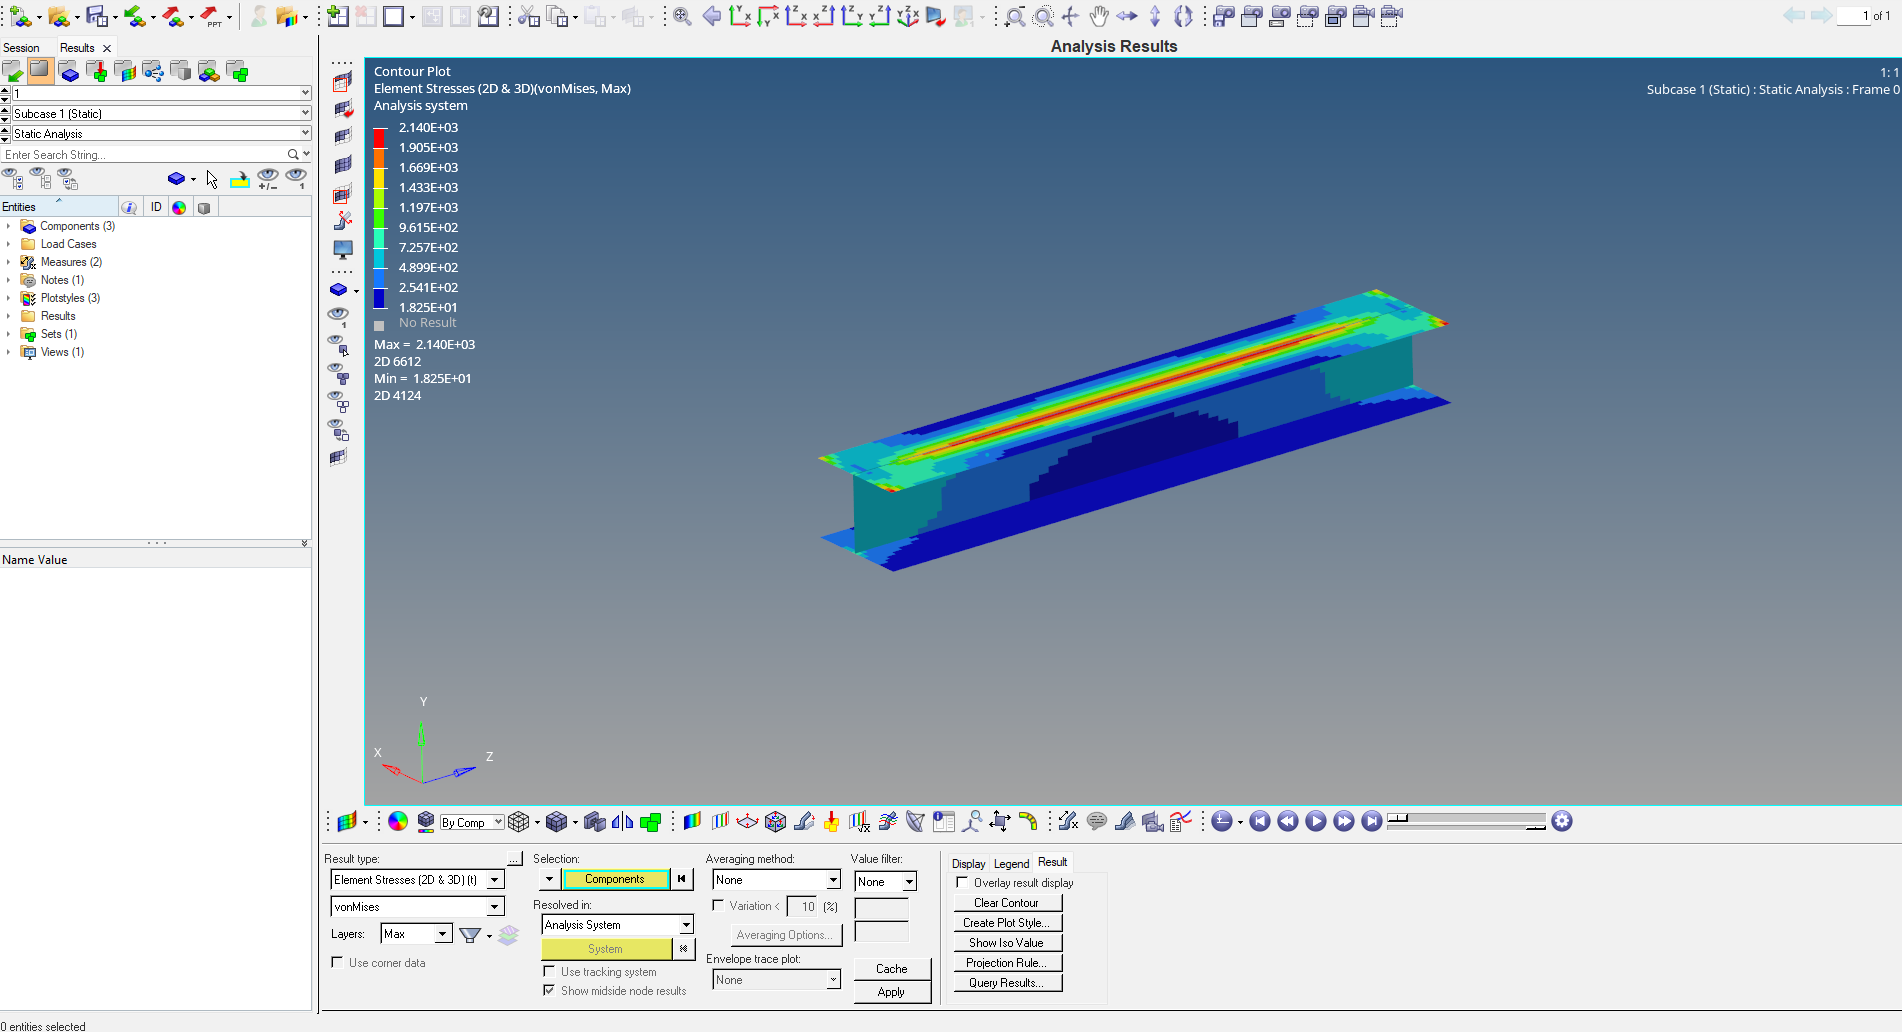
Once the solver run is completed we can click on Results to view the results of the Analysis as shown in the image below.
A window like the below image image will open. This is the Hyperview window and is used to see the results of the analysis. If you don’t know about this don’t worry I will be making a separate post on this.

As can be seen from the image above the maximum stress is 2.14 x 10³ MPa and the yield strength of steel is 250 MPa, this means the beam is failing, additionally, the failing regions are red as shown in the image. So this is how you can perform a linear static analysis on any structure.
I will leave the second case for you to perform as a practice and to observe the difference in results.
So to summarise all the steps:
1. Import and mesh the geometry
2. Apply material and property to the model
3. Apply boundary conditions, i.e. load and constraints
4. Create the load step and run the solver
5. View the results in Hyperview
You can also refer to the below video for more clarity and a step-by-step follow-up for the tutorial.
I will encourage everyone to do hand calculations and compare the results. This is all for this post, make sure to follow my Facebook and Instagram page for regular updates. See you all in the next post till then keep learning.