Ever wished for some additional options in Hypermesh to make your life easy? In this post, we will look at some options to help us with beams and composites. Namely HyperBeam, HyperLaminate, and Hypermorph.
Let’s start with HyperBeam.
HyperBeam:
So What is HyperBeam?
Hyperbeam is used to create and visualize beams of different cross sections. Beams are 1D elements in Hypermesh. You can read more about the type of elements in meshing here.
The created beam section comes under Beam section collectors. In addition to the above Hyperbeam also gives us the center of mass, moment of area, and radius of gyration for the element.
So where and why do we use them?
They can be used where the stress along the other two directions does not vary or can be ignored. We can use HyperBeam to properly visualize the designed section and modify the design of the section. It also reduces our calculation effort by displaying some important data such as area, Moment of inertia, Shear center, etc.
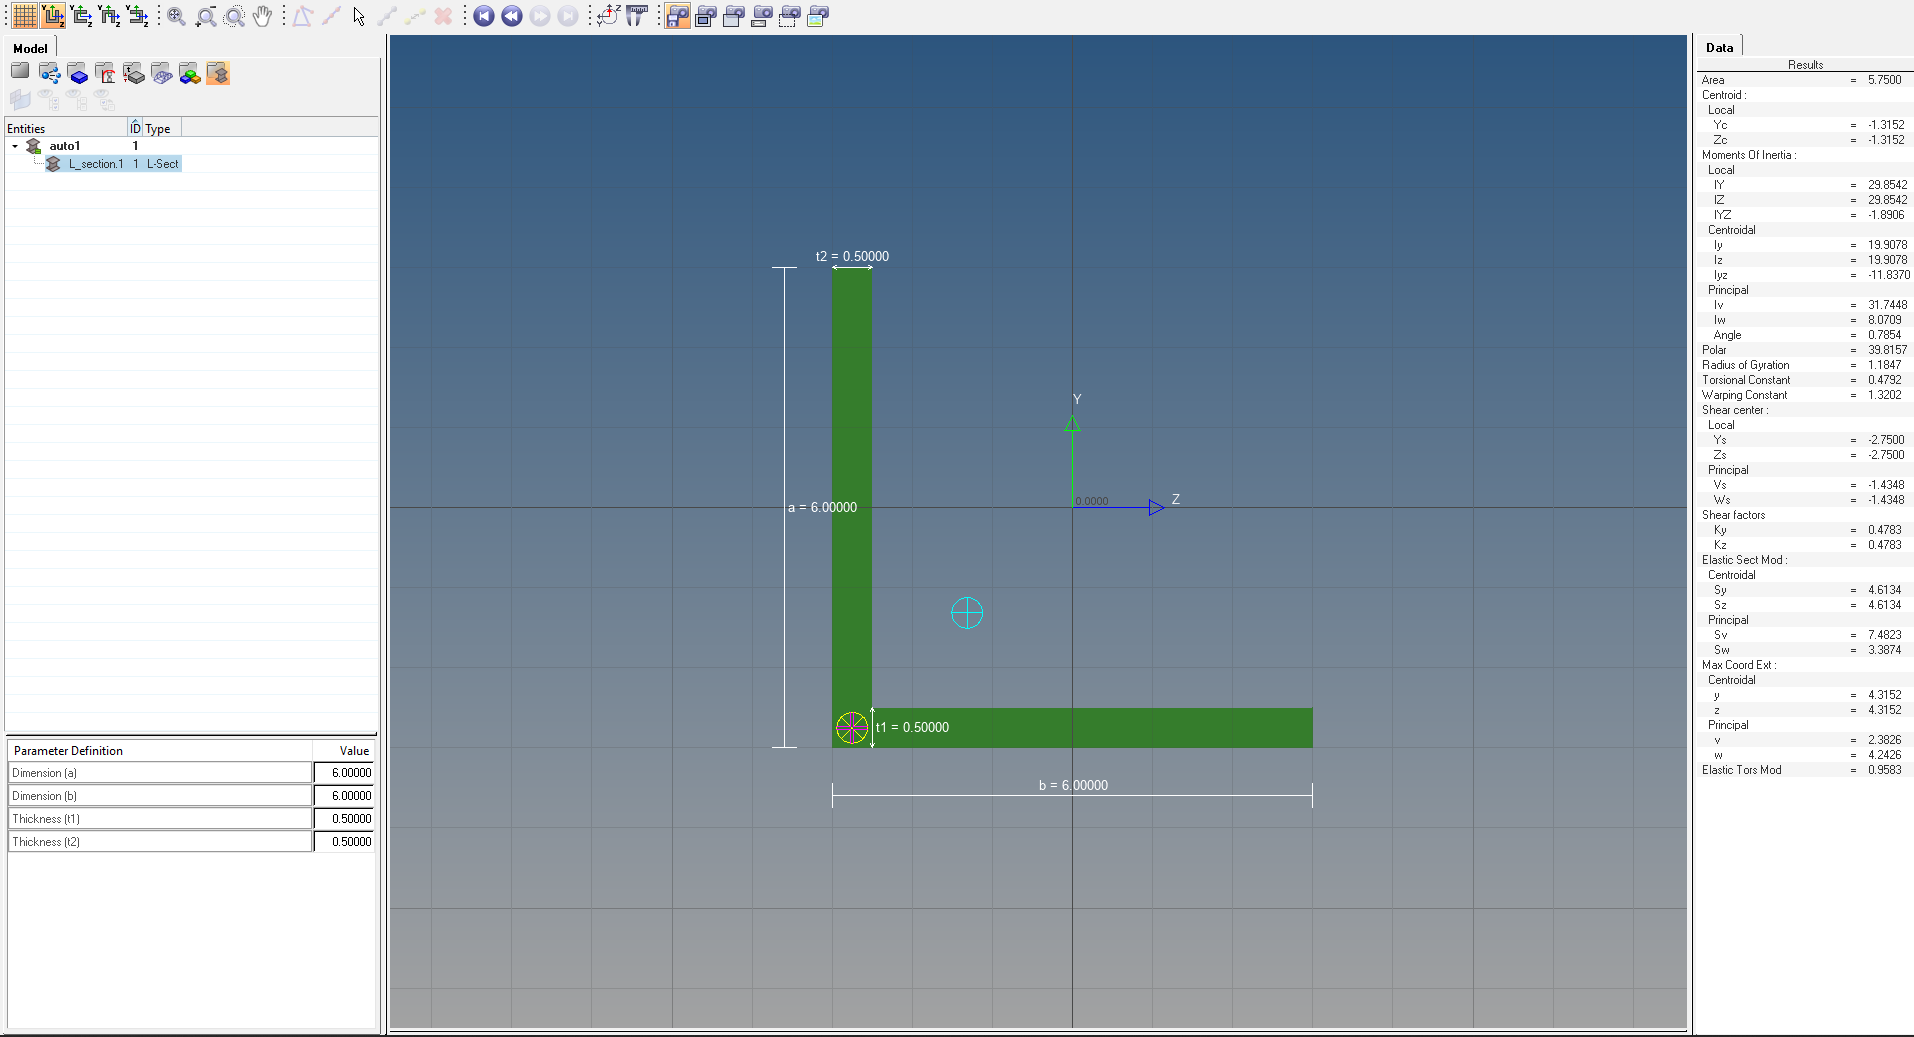
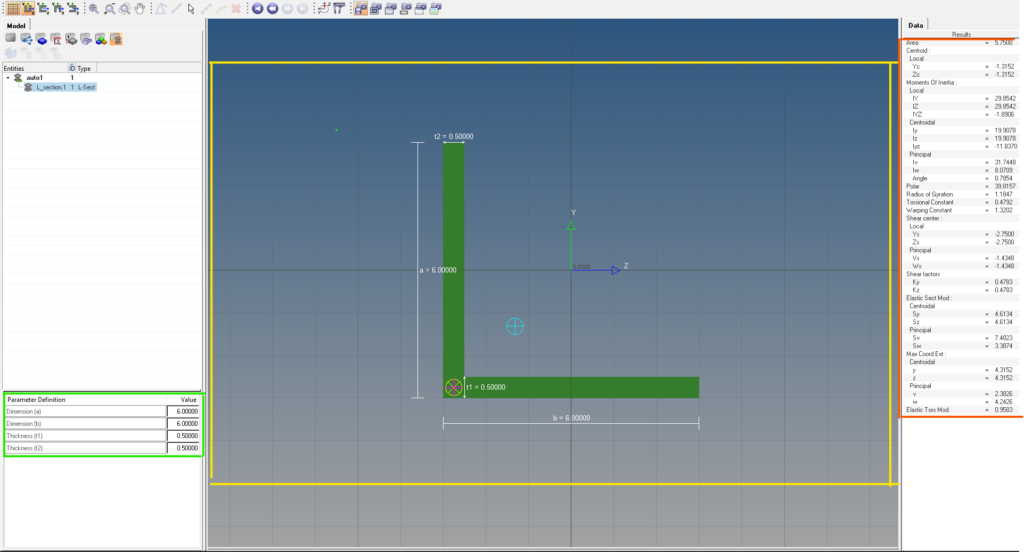
The HyperBeam section can be accessed through 1D-> HyperBeam. Here we have different options for sections such as shell section, solid section, standard section, generic section, etc. Then select the option you want to use and click on Create to open the HyperBeam browser.
In this window, you have the option to edit the dimensions of the beam according to your design while simultaneously visualizing it, highlighted by the green box on the bottom left side of the image below. On the right side highlighted in orange, you get details about the beam section such as area, centroid, Moment of Inertia, radius of gyration, etc. The area in the center highlighted in yellow is the visualization area. Refer to the image below for more clarity on the HyperBeam visualization option.
You can read more about HyperBeam here.
HyperLaminate:
Now what is a HyperLaminate?
For this, we need to understand what is a laminate. A laminate is a material formed by stacking several layers of the same or different materials over one another such that they behave as a single entity. Does this sound familiar? Is it similar to some terms in engineering?
If your guess is composite you are right. This is why the name HyperLaminate, as this module is used to construct, review, and analyze composite or laminate structures.
So where and Why do we use them?
Composite is a growing field with lots of opportunities as the requirement for lightweight and durable structures increases, especially in the field of aerospace and defense. We can analyze stress results in different layers along different directions to design a suitable composite structure.
HyperLaminate can be accessed through 2D-> HyperLaminate. The below image shows what a HyperLaminate window looks like.
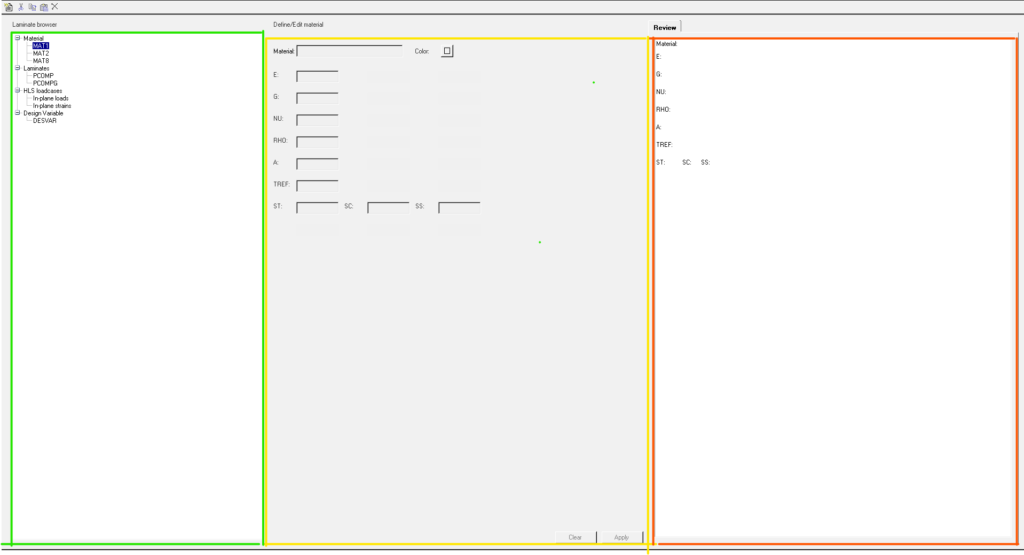
The area highlighted in green is the Laminate Browser which contains the option to select the Materials, Property, loadcase, and Design variables for the Laminate structure. In general, material and property are enough to define a laminate. The area highlighted in yellow is the area where you can edit the materials, properties, load cases, and design variables created. And finally, the review panel shows the values of the selected entity.
The material types available for composite modeling are primarily MAT1, MAT2, and MAT8. The properties available for the same are PCOMP and PCOMPG. If you don’t know what these mean you can read about them here. The load cases contain two entities In-plane loads and In-plane strains. I will be doing a detailed tutorial on composites involving Hyperlaminate and composites options available under 2D.
HyperMorph:
So what is Hypermorph?
Similar to the above section we need to understand what is Morphing to understand Hypermorph. So what is Morphing?
Morphing is to change something from one shape to another. So Hypermorph is used to change the shape of a meshed structure from one shape to another. Hypermorph can be accessed by going to Tool-> HyperMorph.
So why do we use it?
Suppose you have created a mesh and later minor changes in the geometry have been made or you want to do some incremental change in some features of the geometry and observe the results, then hypermorph comes in handy to use instead of meshing it again. It can also be used to mesh complex structures and analyze the results
Options in Hypermorph are arranged in 4 columns, refer to the image below:

The first column from the left contains features that affect morphing, the second column contains options for creating and editing morph entities such as morph volume, domain, and handles. And the third column allows to perform mesh morphing.
Hypermorph provides us with various options to morph a mesh.
- Global Domains and Handles
- Local Domains and Handles
- Morph Volumes
- Freehand
The first two options involve dividing the mesh into domains or segments containing elements or nodes and placing handles at the corners of those domains to morph the underlying mesh. Morph volume involves enclosing the mesh with a volume and then deforming the volume. Freehand involves moving the nodes directly without the need to create any volume or domain. Similar to HyperLaminate I will be doing one tutorial on the various ways of morphing a mesh.
Refer to the below video for a better visualization of the above topics.
This is all for this post. Keep Learning. Don’t forget to follow my Facebook and Instagram pages for regular updates. See you all in the next post.